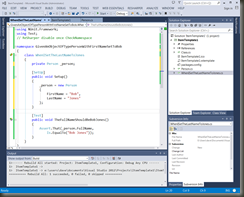
Last week I proposed a structure for unit test that follows the pre-condition, action, post-condition workflow. Basically what you would see in a Use Case document.
The result of this structure when applied to a general NUnit class is that we will end up with our pre-condition and action in our setup method and our post-condition asserts in our test methods.
The problem with this is that sometimes this doesn’t always fit what we are trying to do.
 One of the recurring reasons I hear from people for why they are not implementing unit test in their code is because it takes too long. On one level I get that. But, my experience tells me that the real problem is more likely that they just don’t understand enough about how to implement unit testing to be able to do it well.
 Several years ago, long before the community was actively talking about Test Driven Development, I worked for a short time at a company as a “bug fixer.” That was my role. They had hired me because they had some software that was “basically done” but “had some issues.” It should only take a few weeks.
 SQL has long had the ability to specify that a value is NULL even if it is a primitive type, but the only way you could have a NULL value in VB.NET is if you were dealing with an object. That is, until .NET 2.0
 Several weeks ago I presented jQuery at the DotNet User’s Group in Connecticut. As part of that presentation, I mentioned that I handle errors from my WebServices in a slightly different way than what most authors teach.
 Many times in our queries, we aren’t looking for an exact match. We are looking for one string that exists in another. There are a couple statements available to us that will allow us to do this. The first of these is the LIKE statement, and if you are familiar with DOS or the Linux equivalent, this should look familiar to you. The most common usage of LIKE looks like this: