 One of the recurring reasons I hear from people for why they are not implementing unit test in their code is because it takes too long. On one level I get that. But, my experience tells me that the real problem is more likely that they just don’t understand enough about how to implement unit testing to be able to do it well.
This is like knowing you are supposed to “eat right” and “exercise” but not having anyone tell you how to do either in such a way that you can maintain the habit.
Start Small
So the first rule of unit testing structure, just like the first rule of diet and exercise, is to start small.
When I first started to take a look at unit testing, the general advice was to create a unit test class for each class. Then you were suppose to create a test method for each class. I still see a lot of code as I travel that looks like this as I watch people try to implement the practice.
But how frustrating. And how is that suppose to work when I’m modifying existing code?
Here is how I write unit test…
I’ve had exposure to UML and the most useful part of UML that I tend to use over and over again is the Use Case document. I don’t care so much about the diagram. But the document is really helpful.
In the document we have three parts.
- Pre conditions
- Actions
- Post conditions
If you start thinking about your test under this framework, I think you’ll find that writing test become much easier.
You may be thinking, “But Dave, that’s application level testing, not unit testing.” And my answer would be, “Yes, it is, but your class is a mini application so it can apply to it as well.
So, let’s take the classic Person class as an example:
1 | public class Person |
Our preconditions might be:
- The object has been created
- The FirstName has been set to a known value
One of our actions is going to be:
- The LastName property is set to another known value
The post condition will be:
- The FullName should end up being whatever we had in the first name plus a space plus whatever we added to the last name
So now that we have a use case for our class, how do we model this in our unit test?
Converting the Use Case to a Test Case
Using NUnit since it is still the most popular, our resulting code might look something like:
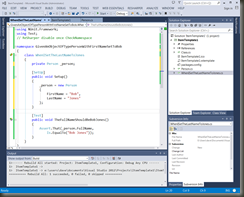
1 | namespace GivenAnObjectOfTypePersonWithFirstNameSetToBob |
Notice how I created a namespace for the given. This makes the code readable in our test runner. I put the precondition and the action in the SetUp method because I want to start fresh with each test. In this case, I only have one test, but in most scenarios, you will have multiple test. You should plan for multiple test.
In this particular case, I only have one post condition. But if I had multiple post conditions, each one would be it’s own Test method with it’s own Assert.
One of the biggest issues I see is people putting multiple asserts inside of one Test method. You don’t want to do this. You want one and only one Assert per Test method. Otherwise, you never know by looking at your test what exactly failed or if the code were to run, that any of the other Asserts fail.
Because we named our namespace, class, and test methods what we are testing, when a test fails, our test runner will display the names for us.
If you think it makes the code more readable, you can use underscores to separate the names. The goal is to make the code read something like your use case.
One final note before we end. Your namespace should match up to the directory the class file is in and the class name should match the file name. This will make the code easy to find. This is something I shouldn’t have to mention, but once again, I’ve seen people ignore the simplest of organizational strategies.
This is just one of several patterns I use for testing my code. What I like about this particular pattern is that it forces my test code to follow the Single responsibility principle. In the case above, this test class is only responsible for testing what happens when I set the LastName property when I’ve already set the FirstName property. I can write another class to test what happens when the FirstName property has not yet been set and yet another for what happens when I set the LastName property first and then set the FirstName property.